
Have you ever thought about turning a plain nursery into a warm, inviting space for your little one without spending a fortune? This handy guide shows you how to get creative with easy projects that add a cozy charm and a dash of personality.
Imagine taking everyday items and turning them into cute, homemade art or keepsakes that light up your baby’s room and keep your budget happy. With simple ideas made just for beginners, you can mix fun and practicality to create a space that’s all your own.
It’s like giving your nursery a little hug every day, warm, personal, and full of gentle touches that grow into lasting memories.
Quick DIY Baby Nursery Decor Ideas to Kickstart Your Project
A few simple tweaks can turn your baby's room into a warm, inviting space. Imagine filling the room with a little extra brightness and charm without spending a fortune. These ideas let you get creative in a safe, fun way that feels uniquely yours.
Each project here is made for beginners and helps keep your budget in check. Whether you're celebrating a new beginning or just adding a dash of charm, these DIY tips are fun and stress-free. They help you enjoy the process and love the results.
- Create a bee felt mobile using felt and twine, perfect for any nursery – Cost: about $10.
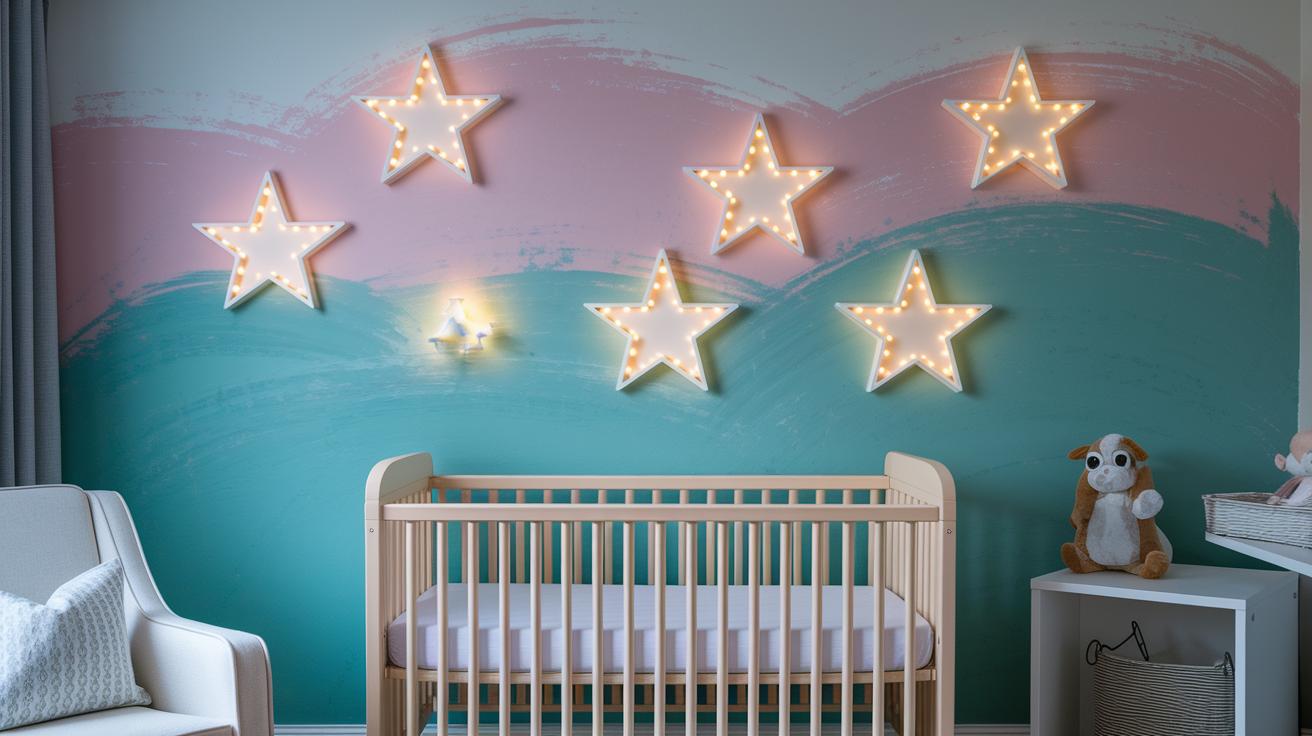
- Add a pop of color with washi tape wall decals in stars or geometric shapes – Cost: about $8.
- Make a custom acrylic name sign that doubles as a hospital announcement – Cost: about $15.
- Craft a handprint keepsake canvas using a small canvas and baby-safe, non-toxic paint – Cost: about $10.
- Build a memento shadow box for storing first outfits and baby cards – Cost: less than $15.
Remember to keep loose items like stuffed animals, pillows, or bumpers out of your baby's sleep area until they are at least one year old. For more on safe sleep guidelines, check out this link: https://bsnuggs.com?p=
DIY Nursery Wall Art Projects to Personalize Baby’s Space
Wall art can quickly brighten up your nursery with warmth and personality. It tells a little story that grows along with your baby and makes the room feel extra special.
Most of these fun projects need only easy, everyday supplies. Picture using small bottles of paint, a soft sea sponge, and cut-out vinyl shapes. These simple items let you mix creativity with practicality without stretching your budget.
For a sponge-painted wall, start by gently dipping a clean sea sponge into a sample-size pastel or neutral paint. Then, dab the sponge lightly across the wall with overlapping strokes. The result is a soft, dreamy backdrop that adds a cozy touch, all for about ten dollars in materials.
If you want to add a burst of cheerful color, try a rainbow ombré wall. Pick five or six favorite paint colors, whether you prefer bright primaries or soft pastels, and blend them slowly. The gradual color shift brings a playful and harmonious feel to the nursery.
For something extra fun, consider a glow-in-the-dark vinyl mural. Begin by painting the wall with a solid base coat and let it dry. Next, cut out star and moon shapes from adhesive vinyl and arrange them carefully on the wall. This design adds both a playful detail and a gentle glow when the room dims.
Painted Nursery Furniture Projects for a Custom Touch
Giving old furniture a second chance is a fun way to create a cozy space for your little one without spending a fortune. Revamping pieces lets you add a personal touch that makes each item feel loved and unique.
One idea is to transform an IKEA dresser. Start by sanding off the old finish so the new layers can stick well. Then, add a light base coat and brush on a white wash pickling to bring out a soft, vintage look. Follow this with a special walnut stain to give it a rich, deep tone. Finally, switch out the old hardware for modern knobs. With simple tools like a sander, brushes, and a cleaning rag, you can turn an ordinary dresser into a standout piece, all for about $30.
Another project is turning a thrifted cabinet into a practical changing table. Look for a cabinet that needs a little love. Paint one side with chalkboard paint so you can scribble cute messages or reminders. Place a changing pad on top and update the look with some new knobs. Using basic tools like a drill and screwdriver, this project breathes new life into an old piece, all for roughly $25.
For a playful touch, consider making a two-tone wooden shelf. Use painter’s tape to create neat lines for a crisp color block effect. Choose a couple of acrylic paint colors that match your theme and carefully fill in the spaces. With minimal supplies, this project costs less than $10 and results in a stylish shelf that can display treasured keepsakes and storybooks.
| Project | Materials | Cost Approx. |
|---|---|---|
| IKEA dresser makeover | Sandpaper, White Wash Pickling, Special Walnut stain, replacement hardware | $30 |
| Cabinet-to-changing-table hack | Thrifted cabinet, chalkboard paint, changing pad, new knobs | $25 |
| Two-tone wooden shelf | Painter’s tape, sample acrylic paints | <$10 |
Crafting Custom Mobiles to Inspire Little Eyes
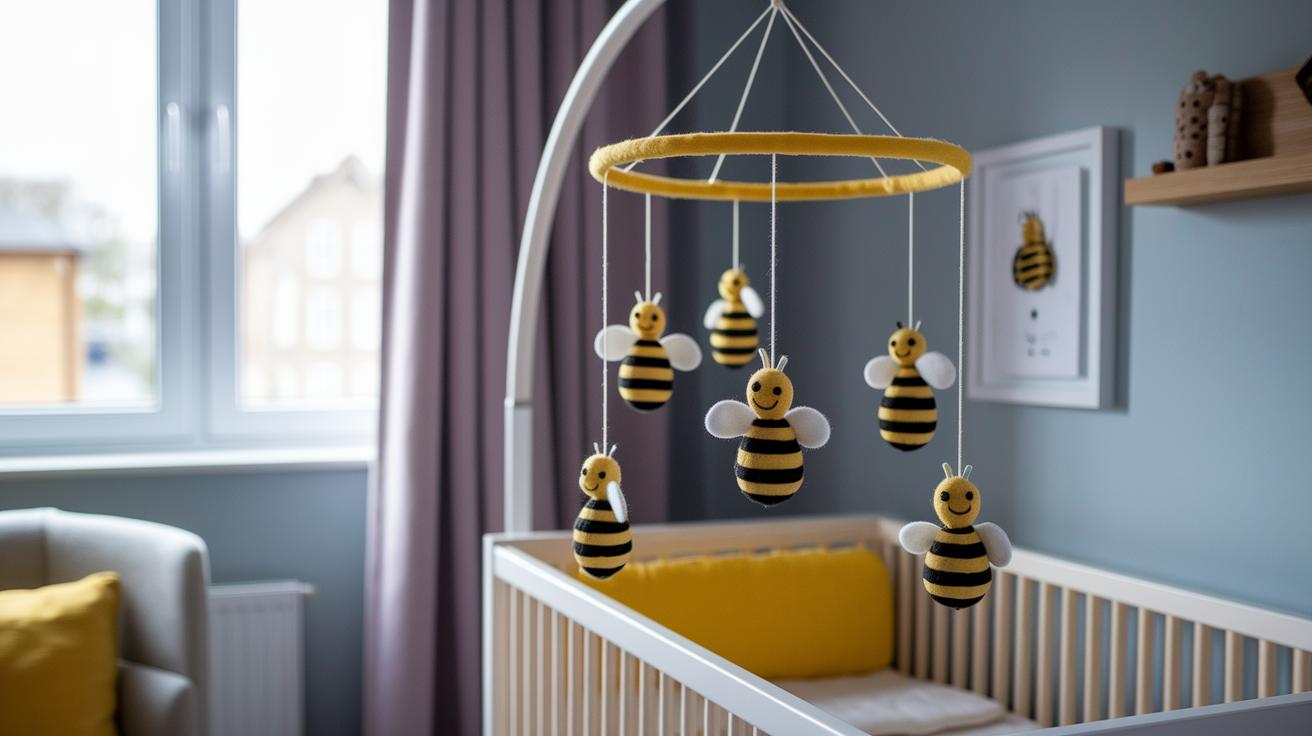
This little project brings a burst of creativity to your nursery while keeping safety top of mind. Custom mobiles add a playful touch and help gently spark your baby’s visual curiosity. You can choose a bee-themed felt mobile, cut out cute bee and cloud shapes from soft felt and attach them to an embroidery hoop with some twine (about $8 in supplies), or create one with assorted shapes like stars and raindrops made from cardstock and hung from a driftwood branch (roughly $12). Either way, you get a fun decor piece that won’t strain your budget.
Materials Required
Gather these essentials: felt (or cardstock), an embroidery hoop or sturdy circular frame, strong twine to secure the shapes, and a pair of sharp scissors for neat cuts. Imagine the soft snip of scissors as you work, crafting pieces that will soon sway gently above your baby’s crib.
Assembly Process
First, spread your cutouts evenly around the hoop or driftwood branch. Tie each piece securely onto its own length of twine so they hang gracefully and safely. As you arrange everything, think about balance, spread the items out evenly to create a calm, harmonious display. And always hang the mobile high enough, out of your baby’s reach, so it delights with its gentle movement while keeping your little one safe.
Budget-Friendly DIY Nursery Storage Solution Crafts
Making the most of your nursery space can be a fun blend of style and practicality. Simple storage projects help keep clutter away while adding a personal, budget-friendly touch.
One idea is to create a headband rack with a painted dowel and playful ribbons. Just mount a small dowel on the wall, tie some colorful ribbons along its length, and use them to hang those cute baby headbands. All you need are a few basic supplies like a small dowel, inexpensive paint, and vibrant ribbons. It takes about 15 minutes and costs less than $5. Place it by the changing area or in a closet so you can easily grab accessories while brightening up the room.
Another smart project is a hanging fabric pocket organizer. You can repurpose an old shoe organizer by trimming each pocket to the right size and hanging it securely on a wooden dowel. With materials you probably already have, you can finish this organizer in about 20 minutes for around $10. It’s a handy spot to store diapers, wipes, or small toys, adding both extra storage and a splash of color to your nursery.
Lastly, consider a floating stained shelf that combines both style and function. Lightly stain a pine board (using just a sample-size amount of stain) and install it with concealed brackets. This project, which takes roughly 30 minutes and costs about $8, is perfect for displaying small books or keepsakes. It not only reduces countertop clutter but also gives the room a cozy, personal feel.
For more nursery organization ideas, visit https://babyhalfoff.com?p=
Personalized Crib Crafts and Accessories for a Unique Nursery

Ever thought about turning a simple wooden plank into a special name board for your baby's crib? Start with a recycled 12"x3" board, give it a gentle sanding, and then use a stencil to add your little one's name in a soft pastel tone. You can even sprinkle in a few cute animal shapes around the letters with a fine brush for extra charm. This little project, complete with basic supplies like primer and paint, takes about 45 minutes and costs around $12. It’s an affordable way to add a personal, heartwarming touch to the nursery.
For a modern twist, try making an acrylic name sign with pre-cut letters. First, lay out your letters on a chosen backdrop, then paint each edge with colors that match your nursery decor. Once the paint dries, mount them on a piece of wood or a strip of ribbon to give the piece a fun, textured look. It’s a simple setup that only takes about 30 minutes and costs roughly $15 in supplies. This project is a blend of style and ease, adding a fresh vibe to your baby’s space.
If you’re feeling creative, a foam flower name sign can be a playful choice. Cut out the letters of your baby’s name and carefully hot-glue foam or paper flowers onto each one. After securing the blooms, finish off your work with a light spray-on sealant to keep it all in place. It takes about 20 minutes and costs around $10, making it a delightful, budget-friendly accent that brings a bit of nature’s whimsy into the nursery.
Accent Wall and Custom Decals for Standout Baby Nursery Decor
Imagine adding a bit of cozy charm to your baby’s room with peel-and-stick shiplap panels. These fun vinyl planks come with a gentle vintage vibe, and you can even paint the seams to match your favorite shades. It costs around $40 and only needs a few basic tools. First, measure and mark your wall, then press the panels firmly onto a clean surface. This simple project not only gives the room a vibrant accent but also lets you adjust things later as your little one grows.
If you’re up for a creative twist, try a decal and stencil mural instead. With this option, you can easily stick on custom vinyl decals featuring playful shapes like clouds or whales, or use washable paint with stencils for a hand-crafted charm. The whole process takes about two hours and costs between $20 and $25, making it a budget-friendly way to bring art and personality into the room. Start by planning your layout so the design looks balanced, then carefully apply the decals or paint your chosen images. This method is great because you can update or remove the decals as your nursery style evolves.
Final Words
In the action, our guide offered quick and affordable projects that brighten any baby's space. We've shared creative wall art updates, painted furniture makeovers, custom mobiles, clever storage crafts, and personalized crib accents. Each step is designed with baby's comfort and safety in mind (check safe sleep guidelines for infants here). Simple, step-by-step tips make decorating fun and budget-friendly. Enjoy every moment of turning your nursery into a warm, unique haven with these DIY baby nursery decor ideas.
FAQ
Q: What are some DIY nursery decor ideas for both boys and girls?
A: The DIY nursery decor ideas cover quick projects like felt mobiles, washi tape wall decals, and custom name signs. They let you create a warm, personalized space suited for a little one.
Q: How can I decorate a baby nursery on a budget?
A: The budget-friendly ideas include felt mobiles, shadow boxes, and acrylic name signs that gently update your baby’s space without high costs, keeping your project stress-free and affordable.
Q: How do I decorate a nursery without painting?
A: Decorating without painting can involve adding washi tape decals, peel-and-stick panels, or fun wall art projects. These options update the room’s look quickly while keeping things fresh.
Q: What are some simple DIY nursery ideas to get started?
A: Simple DIY nursery projects offer easy steps like creating personalized mobiles and wall decor. They use common supplies and minimal tools so busy parents can enjoy personal touches without extra stress.
Q: How can I fill empty space in a nursery?
A: Filling empty space can be done with custom wall art, floating shelves, or a memento shadow box. These projects add charm and character, making every corner feel inviting and thoughtful.

